

These instructions apply to both 64- and 32-bit Windows 10 and Windows 8.1 operating systems.
-
Log into Windows with an administrator account.
-
On the Windows Start screen, type windows features and click Turn Windows features on or off. The Turn Windows features on or off window appears.
-
Expand .NET Framework 3.5 (includes .NET 2.0 and 3.0) and select the two options shown below:

-
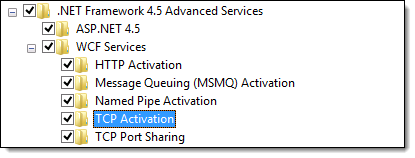
Expand .NET Framework 4.5 Advanced Services and select the options shown below:
-
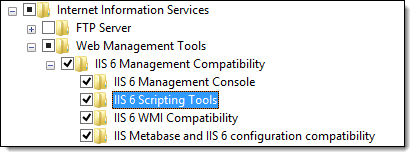
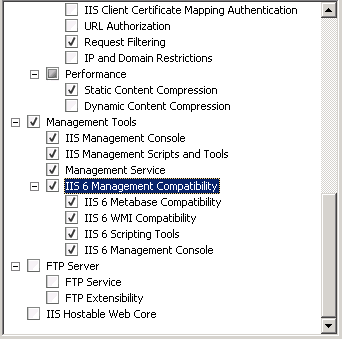
Expand Internet Information Services > Web Management Tools > IIS 6 Management Compatibility, and select the options shown below.
-
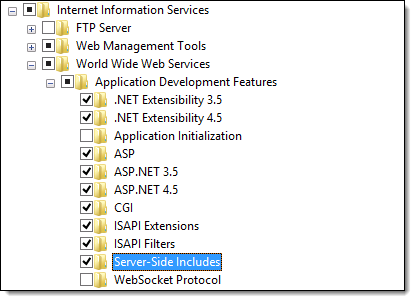
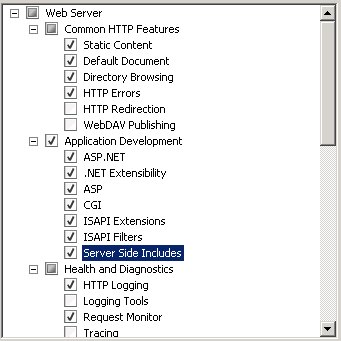
Collapse Web Management Tools, expand World Wide Web Services > Application Development Features, and select the options shown below:
-
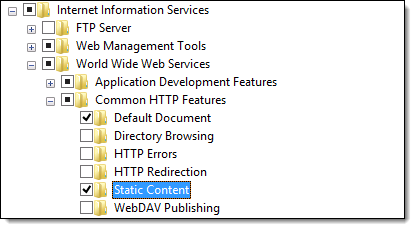
Collapse Application Development Features, expand Common HTTP Features, and select the options shown below:
-
Click OK.
-
Restart the computer and proceed to 1.2 Create an Administrator Account.
These instructions apply to both 64- and 32-bit Windows 7 operating systems.
-
Log into Windows with an administrator account.
-
On the Windows Start screen, type windows features and click Turn Windows features on or off. The Turn Windows features on or off window appears.
-
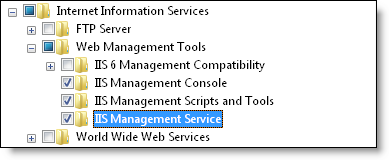
Expand Internet Information Services > Web Management Tools and select the options shown below:
-
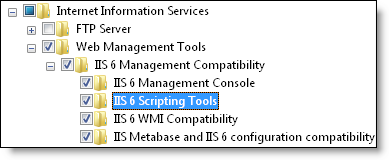
Expand IIS Management Compatibility and select the options shown below:
-
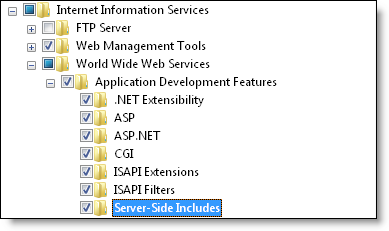
Collapse Web Management Tools, expand World Wide Web Services > Application Development Features, and select the options shown below:
-
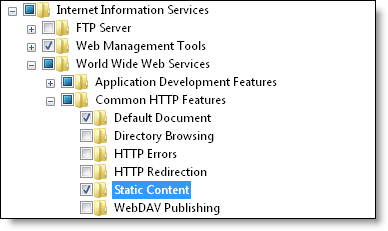
Collapse Application Development Features, expand Common HTTP Features, and select the options shown below:
-
Click OK.
-
Restart the computer and proceed to 1.2 Create an Administrator Account.
These instructions apply to both 64- and 32-bit Windows Server operating systems.
-
Log into Windows with an administrator account.
-
Open the Server Manager.
-
Click Manage > Add Roles and Features. The Add Roles and Features Wizard displays.
If the Before You Begin screen displays, click Next.
-
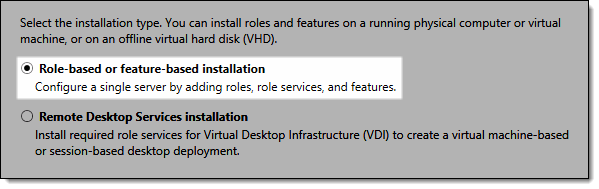
Select Role-based or feature-based installation and click Next.
-
The Select destination server screen displays. Select your server and click Next to display the Select server roles screen.
-
Select Application Server and Web Server (IIS). The Add features required for Web Server (IIS)? window displays.
-
Ensure Include management tools (if applicable) is selected and click Add Features. Click Next.
-
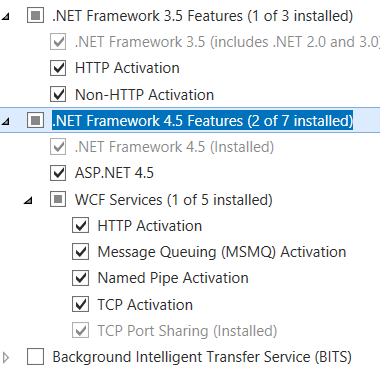
Expand .NET Framework 3.5 Features and select HTTP Activation. The Add features required for HTTP Activation? window displays.
-
Ensure Include management tools (if applicable) is selected and click Add Features.
-
Select Non-HTTP Activation.
-
Expand .NET Framework 4.5 Features > WCF Services and select all available options (as shown below). Be sure to click Add Features on any pop-up windows that appear when selecting these services.
-
Click Next twice. The Select role services for Application Server window appears.
-
Ensure .NET Framework 4.5 is selected, and click Next twice. The Select role services for Web Server (IIS) window appears.
-
Under Web Server:
a. Expand Web Server > Common HTTP Features and ensure the following are selected: Default Document, Static Content, and HTTP Redirection. You do not have to deselect any options that were already selected.
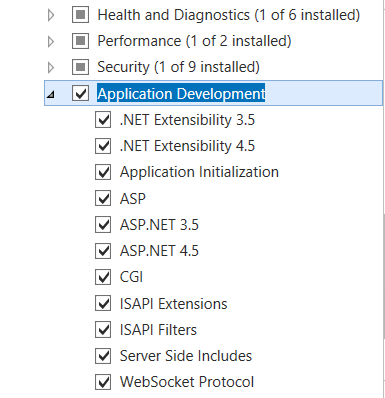
b. Scroll down, expand Application Development, and ensure that all options are selected (as shown below).
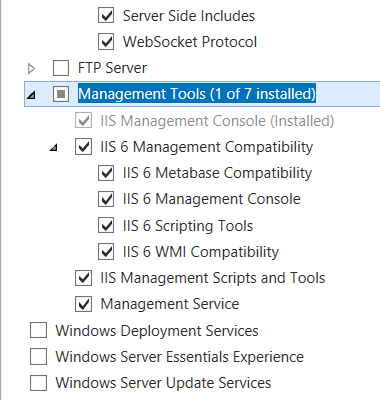
c. Expand Management Tools > IIS 6 Management Compatibility and select all of the options shown below. Be sure to click Add Features for any pop-up windows that appear when selecting these services.
-
Click Next. The Confirm installation selections screen displays.
-
Verify your selections, and then click Install.
-
The Installation succeeded message displays when the installation is complete.
-
Click Close to close the Server Manager.
-
Restart the server and proceed to 1.2 Create an Administrator Account.
These instructions apply to both 64- and 32-bit Windows Server operating systems.
-
Log into Windows with an administrator account.
-
Select Start > Administrative Tools > Server Manager. The Server Manager displays.
-
Click Roles. The Roles screen displays.
-
Click Add Roles. The Add Roles Wizard displays.
If the Before You Begin screen displays, click Next.
-
Select Application Server. The Add features required for Application Server? window displays.
-
Click Add Required Features. You are returned to the Server Roles step.
-
Select Web Server (IIS).
-
Click Next twice. The Select Role Services for Application Server screen displays.
-
Ensure .NET Framework 3.5.1 is selected.
-
Click Next twice. The Select Role Services for Web Server (IIS) displays.
-
Select ASP.NET. The Add features required for ASP.NET? window displays.
-
Click Add Required Role Services.
-
Select ASP,CGI, and Server Side Includes.
-
Scroll down Management Tools and select the options shown below:
-
Click Next and then click Install. The Installation Results screen displays once the installation finishes.
-
Click Close.
-
Restart the server and proceed to 1.2 Create an Administrator Account.