

The first step is to look for clients checked in but not checked out.
-
Click
 on the toolbar.
The Appointment Monitoring Station displays.
- Deselect Include Clients Already Checked Out.
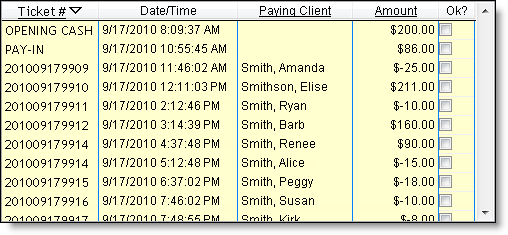
A list of clients not checked out displays.
-
If no clients display, you are ready to process tips and enter the closing totals.
-
If a list of clients displays, review the clients in the list and check out/ring up the clients that showed up for their appointment. Once you have checked out all of the clients that showed up, you are ready to process tips and enter the closing totals.
The next step is to process the tips received by service providers and balance the cash drawer.
-
Make sure every user logs out and close every Register window.
-
Click
 on the toolbar.
The Status window displays.
- Click Close.
The Tip Summary window displays.
- Select one of the following options:
-
If your policy is to pay tips out at the end of each day, click
 to open the cash drawer and remove the tip money from the drawer. Click Close and click No.
 -
If your policy is to pay tips out when the employees are paid, click Classify tips as Pay-in, select "Tips" in the Type field, and click Save.
-
If someone placed a transaction on hold, the Clients ON HOLD window displays. Click Cancel and select whether you want to delete or keep the transaction(s).
The Closing Totals window displays.
- Click Open Drawer to fire open the cash drawer.
- Click Count Cash.
The Drawer Calculator window displays.
- Count the cash left in the drawer and record the totals in the corresponding fields.
Tip: Click Print to print a copy of the totals that you entered on the Drawer Calculator window.
- Click Ok once you have counted the cash in the drawer.
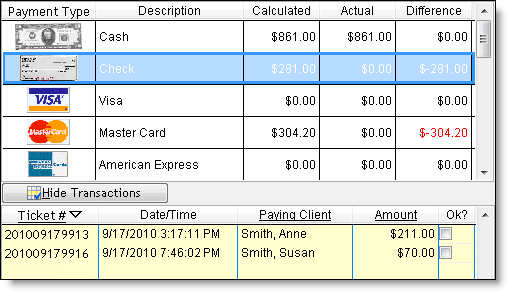
The amount of cash that you counted displays in the Actual field, with the variance between the calculated cash total and actual cash total displayed in the Difference field. If the variance is unacceptable, recount the cash and adjust the actual total as necessary.

When you select the cash payment type, a list of transactions with cash payments displays in the Payment Details section.
If transactions display with a negative dollar amount, this means that the amount shown is a tip for the service provider.
Note: If a negative amount displays in bold text, you need to award the tip to the service provider(s). To correct this issue, select the transaction, click Classify Tip(s), enter the tip to award to the service provider(s), and click Ok.
Important: If you count more cash than the calculated total, check to see whether there are any negative amounts listed in bold text. When the variance is equal to the amount of the negative amounts listed in bold, the employee did not remove the tip money from the drawer. To correct this issue, award the tip to the service provider(s) and pay it back into the drawer, or pay the tip out to the employee(s).
- Click the next monetary payment type in the list.
Tip: Checks, credit cards, and debit cards are monetary payment types.
A list of transactions displays in the Payment Details section.
- In the Payment Details section, select Ok next to a payment once you have verified the corresponding check/payment authorization slip is in the drawer.
Once you verify the last payment, the Insert Actual Amount Counted message displays.
- Click Yes.
A total now displays in the Actual field, with the variance between the calculated total and actual total displayed in the Difference field.
- Repeat Steps 9-11 until you verify the payments received for each monetary payment type.
- Review the total displayed in the Over/Short field.
-
If the amount displayed is acceptable, proceed to Step 14.
-
If the amount displayed is unacceptable, recount the cash, checks, and card payments to make sure that the totals entered in the Actual fields are correct. Proceed to Step 14 once you are certain that the recorded totals are correct.
- In the Cash Left in Drawer field, enter the amount of cash that you are leaving in the drawer to use for change.
- (Optional) If you want to print a deposit slip for the cash you are depositing to the bank, click Deposit Slip and click Yes.
A deposit slip prints on the receipt printer.
- Click Credit Card Maintenance.
The Credit Card Maintenance window displays.
-
If the No Charges/Credits Found message displays, click Close and proceed to Step 17.
-
If a payment that is not attached to a transaction displays, right-click on the payment and select Print Receipt to print a copy of the transaction receipt. Then, select the payment and click Attach Charge/Credit to Transaction to open the Insert Transaction window. Select the cash drawer attached to the computer and click Ok to display the Register. Using the receipt, enter details for the items that the client purchased and click Sale. Click Ok on the Change Due window to finalize the transaction. Repeat these actions if there are additional payments listed on the Credit Card Maintenance window and click Close once the No Charges/Credits Found message displays.
- Click Ok.
The Register close and the Status window displays.
- Click Continue.
You are now ready to run the closing reports.
The final step is to run the reports to help you breakdown today's transactions.
- DCR01: Transactions by Card Type Grouped by Drawer Number report = Displays details of the credit and debit card payments that were processed. You should reconcile the payment authorization slips in the drawer with the payments listed on this report each night.
- MR080: Register Summary report = Displays a balance sheet of the assets and liabilities accrued from transactions processed through the Register. The left side of the report is an accounting summary of how clients paid and includes details of liabilities used for payment. The right side of the report is an accounting summary of the items sold, sales tax collected, and pay ins/outs.
More Info: Refer to the Closing Guide in the Reports User Guide for a list of the reports to run when closing for the day.
The following guide explains how to run the closing reports.
- Click
 on the toolbar.
The Millennium Intelli-Text Control window displays.
-
Type "MR080" in the OR type a report number here (ie MR080) field and press Enter.
The Reports & Graphs window displays.
-
Select "Today" in the Date Range Selection field and click Full Day.
-
Click Print.
The Drawers Selection List window displays.
-
Select the cash drawer connected to the computer, click Move >, and click Ok.
The Page Setup window displays.
-
Print the report as normal.
-
Move back to the Reports & Graphs window.
-
Select "Credit Cards" in the Report Category field.
-
Select the "DCR01: Transactions by Card Type Grouped by Drawer Number" report in the Report List.
-
Select "Today" in the Date Range Selection field and click Full Day.
-
Click Print.
The Drawers Selection List window displays.
-
Select the cash drawer connected to this computer, click Move >, and click Ok.
The Page Setup window displays.
-
Print the report as normal.
-
Analyze today's transactions and reconcile today's payment authorization slips.