Access Windows with an administrator account.
Press Windows Logo+R or select Start > Run.
The Run window displays.
Type "devmgmt.msc" and press Enter.
The Device Manager displays.
Double-click Disk drives.
Complete the following for every disk drive listed:
Right-click on the hard disk and select Properties.
The Properties window displays.
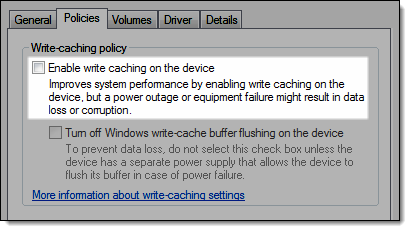
Click the Policies tab.
Deselect Enable write caching on the device.
Click OK.
On the Device Manager, double-click Network adapters, right-click on the network card and select Properties.
The Properties window displays.
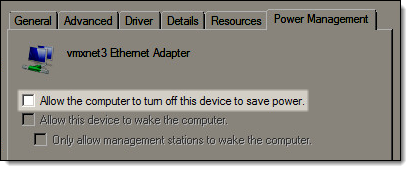
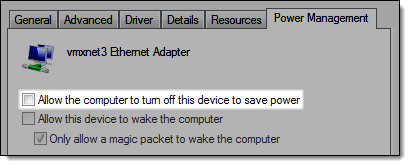
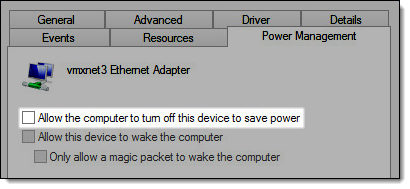
Click the Power Management tab.
Deselect Allow the computer to turn off this device to save power.
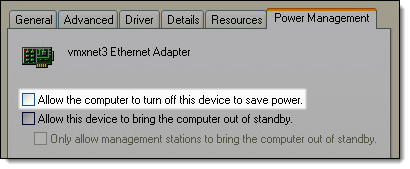
Click OK.
Restart the computer.
-
Click here to proceed with the next step of the installation.
Access Windows with an administrator account.
Press Windows Logo+R or select Start > Run.
The Run window displays.
Type "devmgmt.msc" and press Enter.
The Device Manager displays.
Double-click Disk drives.
Complete the following for every disk drive listed:
Right-click on the hard disk and select Properties.
The Properties window displays.
Click the Policies tab.
Deselect Enable write caching on the device.
Click OK.
On the Device Manager, double-click Network adapters, right-click on the network card and select Properties.
The Properties window displays.
Click the Power Management tab.
Deselect Allow the computer to turn off this device to save power.
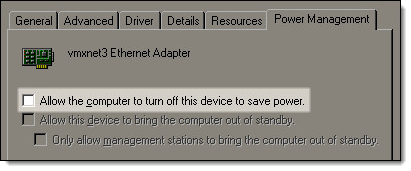
Click OK and close the Device Manager.
Press Windows Logo+R or select Start > Run.
The Run window displays.
Type "sysdm.cpl" and press Enter.
The System Properties window displays.
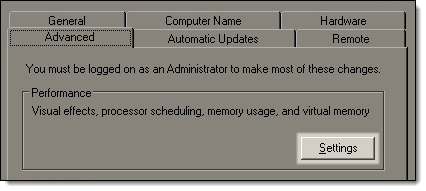
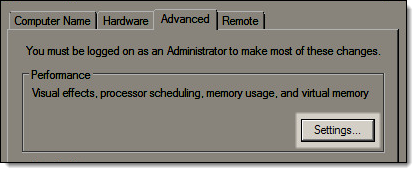
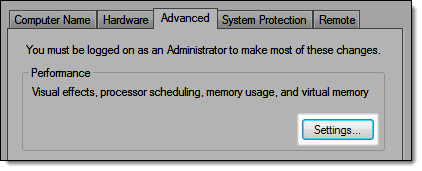
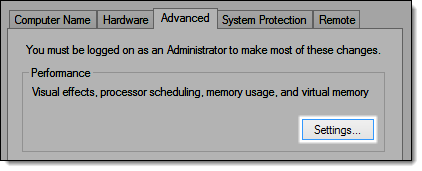
Click the Advanced tab.
Click Settings in the Performance section.
The Performance Options window displays.
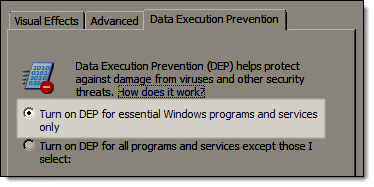
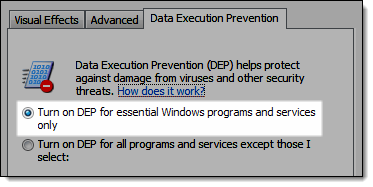
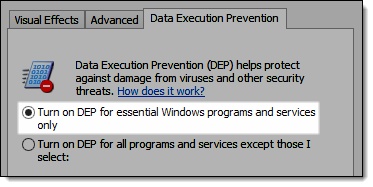
Click the Data Execution Prevention tab.
Select Turn on DEP for essential Windows programs and services only.
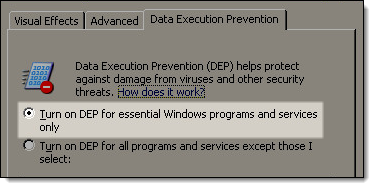
Click OK until the System Properties window closes.
Restart the computer.
-
Click here to proceed with the next step of the installation.
Access Windows with an administrator account.
Press Windows Logo+R or select Start > Run.
The Run window displays.
Type "devmgmt.msc" and press Enter.
The Device Manager displays.
Double-click Disk drives.
Complete the following for every disk drive listed:
Right-click on the hard disk and select Properties.
The Properties window displays.
Click the Policies tab.
Deselect Enable write caching on the device.
Click OK.
On the Device Manager, double-click Network adapters, right-click on the network card and select Properties.
The Properties window displays.
Click the Power Management tab.
Deselect Allow the computer to turn off this device to save power.
Click OK and close the Device Manager.
Press Windows Logo+R or select Start > Run.
The Run window displays.
Type "sysdm.cpl" and press Enter.
The System Properties window displays.
Click the Advanced tab.
Click Settings in the Performance section.
The Performance Options window displays.
Click the Data Execution Prevention tab.
Select Turn on DEP for essential Windows programs and services only.
Click OK until the System Properties window closes.
Right-click on the Windows desktop and select Personalize.
The Personalization screen displays.
Type "uac" in the Search field.
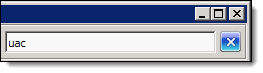
A list of search results displays.
Click
 Turn
User Account Control (UAC) on or off.
Turn
User Account Control (UAC) on or off.
The Turn User Account Control On or Off screen displays.
Deselect Use User Account Control (UAC) to help protect your computer.
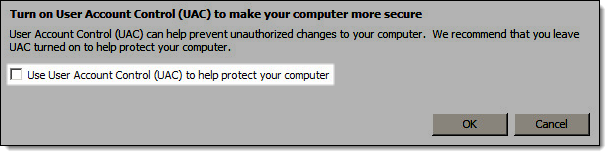
Click OK.
Click Restart Later.
Open the Control Panel and click Network and Internet.
Click Offline Files.
The Offline Files window displays.
Click Disable Offline Files.
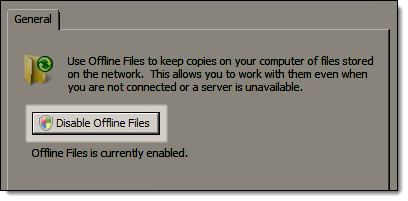
Click OK.
Click Yes to restart the computer.
-
Click here to proceed with the next step of the installation.
Access Windows with an administrator account.
Click Start, type "devmgmt.msc", and press Enter.
The Device Manager displays.
Double-click Disk drives.
Complete the following for every disk drive listed:
Right-click on the hard disk and select Properties.
The Properties window displays.
Click the Policies tab.
Deselect Enable write caching on the device.
Click OK.
On the Device Manager, double-click Network adapters, right-click on the network card and select Properties.
The Properties window displays.
Click the Power Management tab.
Deselect Allow the computer to turn off this device to save power.
Click OK and close the Device Manager.
Click Start, type "sysdm.cpl", and press Enter.
The System Properties window displays.
Click the Advanced tab.
Click Settings in the Performance section.
The Performance Options window displays.
Click the Data Execution Prevention tab.
Select Turn on DEP for essential Windows programs and services only.
Click OK until the System Properties window closes.
Click Start, type "uac", and press Enter.
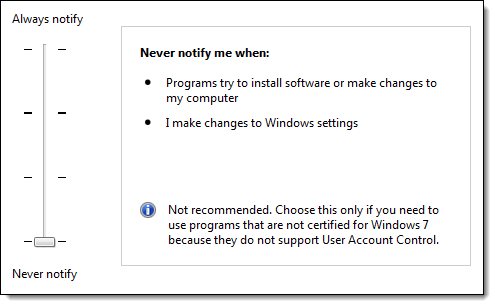
The User Account Settings window displays.
Move the slider to Never notify.

Click OK.
Select one of the following options:
If you have the Desktop Experience feature installed, proceed to Step 19.
If you do not have the Desktop Experience feature installed, click here to proceed with the next step of the installation.
Click Start, type "mobsync.exe", and press Enter.
The Sync Center screen displays.
Click Manage offline files.
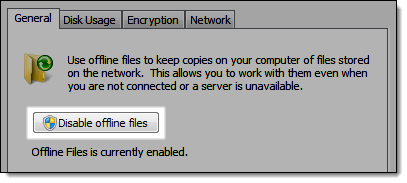
The Offline Files window displays.
Click Disable Offline Files.
Click OK.
Click Yes to restart the computer.
-
Click here to proceed with the next step of the installation.
Access Windows with an administrator account.
Click Start, type "devmgmt.msc", and press Enter.
The Device Manager displays.
Double-click Disk drives.
Complete the following for every disk drive listed:
Right-click on the hard disk and select Properties.
The Properties window displays.
Click the Policies tab.
Deselect Enable write caching on the device.
Click OK.
On the Device Manager, double-click Network adapters, right-click on the network card and select Properties.
The Properties window displays.
Click the Power Management tab.
Deselect Allow the computer to turn off this device to save power.
Click OK and close the Device Manager.
Click Start, type "sysdm.cpl", and press Enter.
The System Properties window displays.
Click the Advanced tab.
Click Settings in the Performance section.
The Performance Options window displays.
Click the Data Execution Prevention tab.
Select Turn on DEP for essential Windows programs and services only.
Click OK until the System Properties window closes.
Click Start, type "uac", and press Enter.
The User Account Control Settings window displays.
Move the slider to Never notify.
Click OK.
Click Start, type "mobsync.exe", and press Enter.
The Sync Center screen displays.
Click Manage offline files on the left menu.
The Offline Files window displays.
Click Disable offline files.
Click OK.
Click Yes to restart the computer.
-
Click here to proceed with the next step of the installation.
Windows 8.1 Professional/Enterprise

Access Windows with an administrator account.
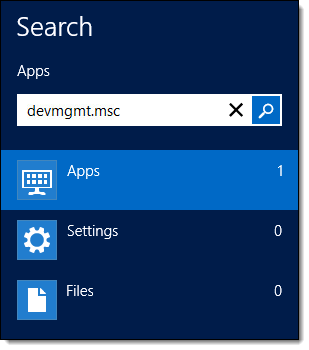
On the Start screen, type "devmgmt.msc" and press Enter.

The Device Manager displays.
Double-click Disk drives.
Complete the following for every disk drive listed:
Right-click on the hard disk and select Properties.
The Properties window displays.
Click the Policies tab.
Deselect Enable write caching on the device.
Click OK.
On the Device Manager, double-click Network adapters, right-click on the network card and select Properties.
The Properties window displays.
Click the Power Management tab.
Deselect Allow the computer to turn off this device to save power.
Click OK and close the Device Manager.
On the Start screen, type "sysdm.cpl" and press Enter.

The System Properties window displays.
Click the Advanced tab.
Click Settings in the Performance section.
The Performance Options window displays.
Click the Data Execution Prevention tab.
Select Turn on DEP for essential Windows programs and services only.
Click OK until the System Properties window closes.
On the Start screen, type "computer" and press Enter.
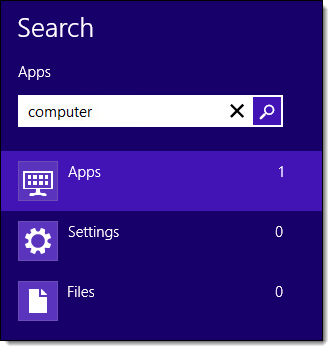
The Computer window displays.
Click the View tab on the ribbon.
Click Options.

The Folder Options window displays.
Click the View tab.
Scroll down the list and deselect the Hide extensions for known file types and Use Sharing Wizard options.
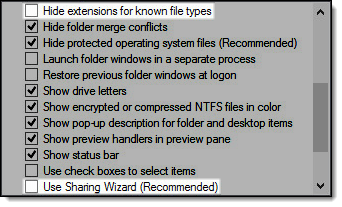
Click OK.
On the Start screen, type "cmd".

Right-click on the Command Prompt app and select Run as administrator.
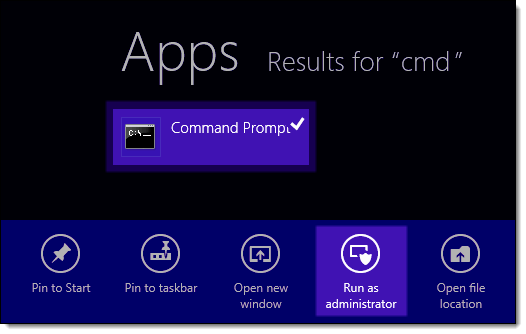
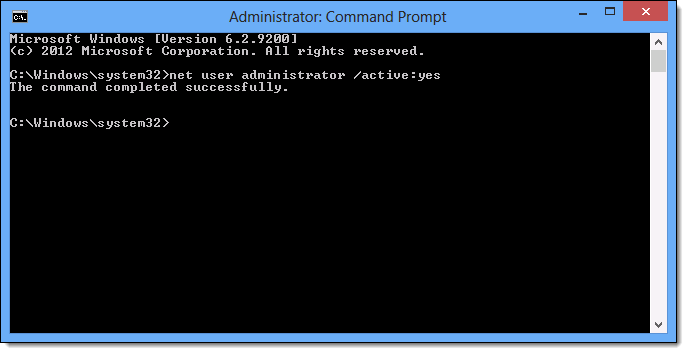
The Command Prompt displays.
Type "net user administrator / active:yes" and press Enter.
On the Start screen, type "control panel" and press Enter.

The Control Panel displays.
Click User Accounts.
Click Manage another account.
Click the Administrator account.
Click Change the password.
Type a password to use for the Administrator account.
Click Change password.
Click Manage User Accounts
Click the Add
Enter standard User Name/Domain
Click Next
Keep as a Standard User
Click Next
Click Finish
Open Windows Firewall
Add Exclusions BOTH Inbound and Outbound for Port 445 TCP
Restart the computer.
-
Click here to proceed with the next step of the installation.
Access Windows with an administrator account.
On the Start screen, type "devmgmt.msc" and press Enter.
The Device Manager displays.
Double-click Disk drives.
Complete the following for every disk drive listed:
Right-click on the hard disk and select Properties.
The Properties window displays.
Click the Policies tab.
Deselect Enable write caching on the device.
Click OK.
On the Device Manager, double-click Network adapters, right-click on the network card and select Properties.
The Properties window displays.
Click the Power Management tab.
Deselect Allow the computer to turn off this device to save power.
Click OK and close the Device Manager.
On the Start screen, type "sysdm.cpl" and press Enter.

The System Properties window displays.
Click the Advanced tab.
Click Settings in the Performance section.
The Performance Options window displays.
Click the Data Execution Prevention tab.
Select Turn on DEP for essential Windows programs and services only.
Click OK until the System Properties window closes.
On the Start screen, type "cmd".
Right-click on the Command Prompt app and select Run as administrator.
The Command Prompt displays.
Type "net user administrator / active:yes" and press Enter.
On the Start screen, type "control panel" and press Enter.
The Control Panel displays.
Click User Accounts.
Click Manage another account.
Click the Administrator account.
Click Change the password.
Type a password to use for the Administrator account.
Click Change password.
Click Manage User Accounts
Click the Add
Enter standard User Name/Domain
Click Next
Keep as a Standard User
Click Next
Click Finish
Open Windows Firewall
Add Exclusions BOTH Inbound and Outbound for Port 445 TCP
Restart the computer.
-
Click here to proceed with the next step of the installation.